Bookmark This Page

Bookmark and Share

Wednesday, December 27, 2006

Under-The-Sea Dessert

This recipe is really easy to make and if you absolutely must cut back on calories, just leave off the whipped cream and eat the cherry! Or splurge and have two!

Your Ingredients:
(serves 8)


1 can peach halves in light syrup (15-1/2 oz), undrained
1 c boiling water
1 pkg lime flavored gelatin (3 oz)
1/4 tsp salt
1 T freshly squeezed lemon juice
1 pkg cream cheese, softened (8 oz)
1/8 tsp freshly ground nutmeg
1/8 tsp cinnamon
16 oz low calorie whipped cream
2 limes
maraschino cherries (with stems)

DRAIN
peaches, reserving ¾ cup of the syrup. Dice peaches and set aside.

STIR
boiling water into gelatin and salt in a medium bowl until completely dissolved. Stir in reserved peach syrup and lemon juice. Pour 1-1/4 cups of the gelatin mixture into 8x4-inch loaf pan sprayed with cooking spray. Refrigerate about 1 hour or until set but not firm (should stick to your finger when touched).


IN
the meantime, use your lemon zester to make delicate strips of lime rind for garnish. If you don’t have a zester, use a swivel type potato peeler or regular grater to lightly shred the lime rind. Be careful not to peel or grate into the white pithy part, as it is quite bitter.


BEAT
remaining gelatin mixture gradually into the cream cheese until smooth. Stir in peaches, nutmeg and cinnamon. Spoon over the clear gelatin in pan.


REFRIGERATE
4 hours or until firm. Unmold and cut into 8 slices. Place on dessert plates. Add a dollop of whipped cream to each slice and garnish with lime zest and maraschino cherry.


Note:
The cooking spray should help release the dessert from the pan but if you have any problem, just place the pan in your sink and run the hot water for a minute. It should slide right out.


P.S.
I hope that you found this recipe yummy and easy to prepare. Let me know if you'd like more like these by posting your comment below.


Always Enjoy!signature_small.jpg

Tuesday, December 26, 2006

Eggnog Recipe

This recipe is oh so delicious!

One of my gifts this Christmas was a humongous bottle of Kahlua. My friend gave it to me because I use it in quite a few cookie and brownie recipes and she didn’t want me to have any excuses when it came to her supply of goodies this coming year.

On Christmas day, I decided to put a little in some eggnog since the thought was pretty appealing. Hey, Christmas cheer!

That was around noon. Well, as folks started stopping by, I’d fix them my fabulous concoction and of course, I’d have to join them for a toast, which meant that I’d have to make myself a refill. I mean, I refused to be impolite, especially on a holiday.

Around three o’clock, I began to notice that folks were staying instead of just popping by and heading home to tend to their own Christmas festivities as they usually did. I wondered if they were planning on staying for dinner. I didn’t mind if they did, since I always prepare a ton of different things.

Oh, I forgot to tell you…even though I’d toast with the newcomers, others in the old group kept finding things to toast to. And as you’ll agree, it would have been in bad taste for Your Smiling Chef to refuse to join in.

Well, let me tell you. Not only did folks hang around forever, but I am the creator of a brand new dance! I wish that I had a video to show you so that you could follow along.

Before I knew it, everyone had joined in! We were all so very happy dancing the hours away as we found new things to toast to. And you won’t believe this, but I’ll share it with you anyway…I have also created a newer version of “Saturday Night Fever!” I can’t exactly remember how it goes, but I’m sure that someone has told someone else who knows another someone who is a talent scout, all about me and my extraordinary dancing and singing talents that I choreographed myself!

You folks better grab all of my recipes as soon as you can. Why? Because one day, in the not too distant future, you’ll be standing in line in your supermarket and happen to glance over at the magazines. And who do you think you’re gonna see?

Well, what kind of question is that? It’ll be “Your Singing & Dancing Smiling Chef” of course!

Your Ingredients: (serves many dancers)

4-6 ounces good quality eggnog
2-4 ounces Kahlua
whipped cream
nutmeg

USING a brandy snifter, pour in the eggnog. Pour the Kahlua over the eggnog and top with a dollop of whipped cream. Sprinkle with a dash of nutmeg.

Now although I didn’t try this because I didn’t have any cinnamon sticks, you can probably use one as a festive stirrer instead of the plain plastic kind. I’m just not sure that eggnog and cinnamon go together.

Note: I should probably give you a non-alcoholic substitution for the Kahlua like the following:

For every two tablespoons of Kahlua, substitute 1 teaspoon of chocolate extract or 1 teaspoon of instant espresso powder.

But I can assure you that you won’t be impressing talent scouts like I am. Well maybe I’m not right now because I’m virtually unknown at this time. Just give it a few more days.

Always Enjoy!signature_small.jpg

Friday, December 22, 2006

Spicy Honey-Mustard Bacon

I can’t think of anything (well almost anything) that smells more delicious in the morning than the heavenly aroma of bacon. I don’t care whether it’s baked or fried. It’s just one of those wonderful aromas that can wake you up from your deep and entertaining dream world, once you get a whiff.

I mean, you could be having a once in a lifetime dream about that one person who gives you the warm and fuzzies. They don’t even have to be a real person. They could be a figment of your imagination. It could be a curvaceous or studly Goodyear blimp. They could be Nancy the cartoon character all grown up with a different hairstyle.

Maybe you get all warm and fuzzy about the thought of having a date with a top-secret government official. Or perhaps, just a top that you keep secretly. You may have been dreaming about someone at work who finally kissed you passionately. Or, it may have been about lovingly squeezing a passion fruit.

Hey, whatever or whomever, I’m really sorry that this delicious aroma came between you and the object of your dreams.

I don’t even know what to tell you except…you should have invited them for some of this fabulous tasting bacon!

Your Ingredients: (serves 6)

4-tbsp honey
2-tbsp prepared yellow mustard
1/2-tsp cayenne pepper, or more
1-1/2 pounds thickly sliced quality smoked bacon

PREHEAT oven to 375ºF.

IN a small skillet, whisk together the honey, mustard and cayenne pepper and simmer on low until mixture is melted, about 5-minutes. Set aside.

LINE a baking sheet with parchment paper. It would also be great if you had the rimmed type.

ARRANGE the bacon slices in a single layer on the baking sheet.

USING a pastry brush, coat the top of the bacon with the spiced-honey mixture and place in the preheated oven.

BAKE for about 10 minutes and brush the top again. Bake until bacon is crispy and sizzling, about 10 minutes longer (depending on the thickness of the bacon and your particular oven temperature).

REMOVE bacon from the oven and immediately drain on paper towels, glazed side up.

SERVE hot.


Always Enjoy!signature_small.jpg

Thursday, December 14, 2006

Chocolate Snickerdoodles

How can you resist these yummy little bites?

Your Ingredients:

1/2-cup butter, room temperature
1-cup granulated sugar
1/4-tsp baking soda
1/4-tsp cream of tartar
1/8-tsp of salt
1 large egg
1-tsp pure vanilla
1-cup all-purpose flour
1/3-cup unsweetened cocoa powder
1/4-cup Heath Bar chips
1/4-cup semi-sweet chocolate chips
3-tbsp sugar
1-tsp ground cinnamon

PREHEAT oven to 375ºF.

IN the bowl of an electric mixer, beat butter on high about half a minute.

ADD sugar, baking soda, cream of tartar, and salt and beat until ingredients are well combined.

BLEND in egg and vanilla.

ADD the flour and cocoa and blend well. Remove from mixer and stir in the Heath Bar chips.

IN a small bowl, whisk together the 3-tablespoons of sugar and cinnamon.

ROLL about a teaspoon of the cookie dough in your palms to form a ball and roll the ball into the sugar cinnamon mixture.

PLACE balls of dough onto ungreased cookie sheets about an inch apart.

BAKE in preheated oven until edges are firm, about 8-11 minutes (oven temperatures vary).

REMOVE from oven and allow to rest about a minute and then transfer cookies to a cookie rack to cool completely.

Always Enjoy!signature_small.jpg

Really Spicy Chickpeas And Nuts

This is a delicious version of another recipe that I was given recently. I love pistachios, almonds, hazelnuts and macadamias and they go perfectly with my other favorite, chickpeas.

I could eat chickpeas all day. I could eat them alone. I could eat them with lots of other stuff. Well, maybe not in my cereal. I'm pretty particular about what goes into my cereal bowl. If it's not Great Grains, it doesn't have a chance of getting into my cereal bowl.


Speaking of my cereal bowl...HOLD IT! You've gotten me off track again...we're supposed to be
talking about filling up your candy/nut serving bowl with this delicious snack instead.

Your Ingredients:

1 (15 to 15-1/2 ounce) can of chickpeas (garbanzo beans), rinsed, drained very well and thoroughly dried with paper towels
1-tbsp plus 3 additional tbsp extra virgin olive oil
1/2-cup shelled unsalted pistachios
1/4-cup raw whole almonds
1/4-cup raw hazelnuts (filberts)
1/4-cup raw macadamia nuts
1-1/2-tbsp coarse sea salt
2-tbsp cayenne pepper (okay, okay…don’t be a baby!)
1-1/2-tbsp fresh thyme, minced
1-1/2-tbsp fresh rosemary, minced

PREHEAT oven to 400ºF.

IN a large bowl, toss the ‘thoroughly dried’ chickpeas with 1-tablespoon of olive oil and make sure all of the chickpeas are well coated. (I can’t emphasize the drying part enough…you will bite into soggy chickpeas if they don’t start out dry enough before they go into the oven the very first time)

SPREAD chickpeas on a foil-lined cookie sheet in an even layer.

PLACE sheet into the oven and bake until golden, about 30-35 minutes.

REMOVE from the oven and pour them back into the bowl that you tossed them in.

ADD the additional 3-tablespoons of olive oil along with the remaining ingredients and toss everything until everything is well coated.

SPREAD chickpeas and nuts on the foil-lined cookie sheet and bake until everything is golden, about 10-12 minutes. Be careful not to burn!

REMOVE from the oven and allow to cool, then place in your favorite pretty snack dish.

Always Enjoy!signature_small.jpg

Wednesday, December 13, 2006

Shrimp Salad

This scrumptious shrimp salad (try saying that five times really fast) is not only an excellent summer treat, but you can make it as an addition to your holiday party platter.

Your Ingredients: (serves 4-6)

4-cups freshly cooked boiled shrimp, medium size is fine
2 hard-boiled eggs, chopped
1/2-cup celery, washed and very thinly sliced on the bias
2 anchovies, rinsed and minced
2-tbsp capers, drained
2-tbsp green (or black) olives, drained and thinly sliced into rounds
2 scallions, washed and sliced into thin rounds
4-tbsp extra virgin olive oil
2-tbsp white tarragon vinegar
1-tbsp freshly squeezed lemon juice
Cayenne pepper
1/2-cup Hellmann’s mayonnaise, more or less


CUT boiled shrimp into half-inch pieces

IN a large bowl, combine the shrimp, chopped eggs, celery, anchovies, capers, olives, and scallions and toss well.

IN a separate bowl, whisk together the olive oil, vinegar, lemon juice, and cayenne pepper.

ADD the olive oil mixture to the shrimp mixture and toss well to blend.

ADD mayonnaise to your shrimp mixture and blend thoroughly. There should be enough mayonnaise to bind ingredients together.

MOUND shrimp salad on a platter lined with Bibb lettuce or Arugula leaves (which has a peppery bite).

SERVE with thin, crispy vegetable, onion or garlic crackers.

Always Enjoy!signature_small.jpg

Saturday, December 09, 2006

Fudge Fudge Fudge

I used to try to stay away from the Fannie May Candies store before they did whatever it was that they did. It didn’t work though. Personally, I’m glad that they aren’t hanging out on the corner, in plain view anymore! They used underhanded trickery to get me in there every time. I’d be walking along, minding my very own business and WHAM!…they’d sneak up on me so fast you would have thought they were attached to my necklace.

Well, no more! I’m glad to be rid of them and their extra smooth and creamy milk chocolate fudge that you could get with or without nuts. The very nerve of them, having those delectable square pieces of velvety maple walnut fudge right in the window where you couldn’t help but look at them.

And do you know how they GOT YA? They had the unmitigated gall to give you a SAMPLE! Can you believe them???

Oh gosh…I sure do miss them. Sniff…sniff…sniff.

I found this fudge recipe in Aunt Nancy’s box and it looks like she’d had it for ages although I don’t remember her offering any. Hmmm…perhaps she ate it all. Now, although this recipe for fudge pales in comparison to my favorite old candy store, it’s a pretty darn good substitute for the non-commercial baker.

Your Ingredients:

NOTE: You will need a candy thermometer. (20 bucks or less)

2-tbsp butter, divided and room temperature
4-cups sugar
1 (12 oz) can evaporated milk
1 stick butter
2 (12-oz) pkgs Hershey’s semi-sweet chocolate chips
1 (7.5 oz) jar Marshmallow Fluff
2-tsp pure vanilla extract
2-cups walnuts, chopped

BUTTER the inside of a medium-sized heavy saucepan with 1-tbsp of butter.

BUTTER a 13x9-inch pan with the remaining 1-tbsp of butter. (you can also add parchment paper to the buttered pan and also butter the top of the parchment)

COMBINE sugar, evaporated milk and 1 stick of butter in the buttered saucepan.

COOK over medium heat, stirring frequently, until mixture reaches the soft-ball stage, about 236 F.

REMOVE pot from heat. DO NOT stir, DO NOT remove the thermometer, and let it rest in a bowl of cold water until the temperature reaches about 110-120 degrees F., about 10 minutes.

STIR in chocolate chips, Marshmallow Fluff, vanilla and walnuts. Blend well until chocolate and fluff are melted.

SPREAD evenly into prepared pan and score the fudge into 1-inch squares. Allow fudge to cool on the counter at room temperature for about 4 hours.

CUT into 1-inch squares. Store in the fridge.


Always Enjoy!signature_small.jpg

Friday, December 08, 2006

Glazed Sweet Potatoes

This mouthwatering recipe for glazed sweet potatoes comes from another friend, Lady B. That’s not actually her real name though. Her real name is one of those names that you'd just rather forget and tuck away into the recesses of your mind. Otherwise, every time you came in contact with her, you'd burst into a hilarious fit of laughter. And that wouldn't be a good thing.

She’s pretty much the matriarch of her entire family (well, the entire world, actually) and if you don’t call her Lady B, she can get as crabby as all get out.

Did I say, “…she can get as crabby as…?” What I meant to say is that she can be the crabbiest. That’s the superlative of crabby. I’d like to invent a super-duper superlative though. What’s Webster’s home number?

No, you don’t want to be on the wrong end of her wrath. You may as well just chew glass. But the woman’s got a heart that will make you cry. She’s one of the (if not THE) finest people that I’ve ever met in my entire life that isn’t related to me. And to top it off, the woman can COOK like, well…the finest chef in the entire world. Except for her chili though. It’s just too darn HOT! But don’t ever tell her that I said that…I’d have to break some glass.

Your Ingredients:

4 large sweet potatoes
3-4 cups granulated sugar
1-cup water
1-tbsp ground allspice
1-tbsp ground nutmeg
1-1/2 sticks butter, cold and sliced
3-tsp pure vanilla extract
1/2-tsp salt

PEEL the sweet potatoes, wash them and slice them lengthwise as thin as possible.

NOTE: I always place sweet potatoes on a cutting board and use a very sharp chef’s knife to slice. Keep your fingers out of the way though, with both hands on top of the knife, because they are usually quite hard and very difficult to slice. I can’t tell you how many times I’ve exerted pressure on the knife and a finger happened to be in the way! Another tool for slicing, which would definitely be worth your investment, is a mandoline. You’ll be able to use that tool for many different prepping tasks.

PLACE the sliced sweet potatoes in a shallow pan that has a fitted lid.

SPRINKLE the sugar on top of the potatoes but DO NOT stir them up, just leave the sugar on top. (I know it seems like a lot but it’s the key to your glaze)

PLACE the pan over high-heat and pour the water around the edges of the pan, not disturbing the sweet potatoes and sugar. Cover the pan and bring it to a rolling boil.

REMOVE the lid and turn heat down to medium (not low).

ADD allspice, nutmeg, dot with butter, vanilla, and salt. DO NOT stir or blend or anything. Leave the sweet potatoes alone and let them do their thing.

LEAVE uncovered and turn the heat down to medium. Cook sweet potatoes until they get tender and juicy, with a thick buttery glaze, about 40-45 minutes.

SERVE these deliciously sweet and syrupy potatoes with Honey Baked Ham™ and string beans.

YUM…YUM…YUM!

FINAL NOTE: I realize that 3-4 cups of sugar seems excessive but that’s one of the secrets to perfectly glazed sweet potatoes. The other secret is to leave them completely undisturbed while cooking. Leave the ingredients where you place them. It will all come together.


Always Enjoy!signature_small.jpg

Sunday, November 26, 2006

Patti LaBelle’s Macaroni and Cheese Recipe

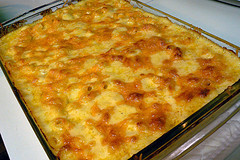
I was invited to a friend’s home this Thanksgiving where one of the courses served was Patti LaBelle’s magnificent macaroni and cheese. It’s been about three years since I made it myself and boy oh boy…did it bring back memories. Patti’s recipe is hands down, THE BEST that I have ever had the pleasure of preparing. Okay, okay, what I really meant to say is that the pleasure factor in eating this scrumptiously creamy mixture of good stuff will almost bring tears to my eyes! All right, maybe one or two have fallen but not in my macaroni and cheese. Nope…I had the good sense to turn my head. The saltiness of my tears would have completely messed up the balance of Patti’s ingredients. Speaking of tears, did you know that it’s healthy to shed them? The American International Worldwide Domestic & Foreign Embassy Society of The National Association of The Tear Shedding Consortium (aka “TAIWDFESTNATTSC”) says so right there in their brochure. I ordered one and was elated to find that I had been practicing healthy macaroni and cheese eating habits all along.

Your Ingredients:

1-tbsp vegetable oil
1-pound elbow macaroni
8-tbsp (1 stick) plus 1-tbsp butter
1/2-cup (2-ounces) shredded Muenster cheese
1/2-cup (2-ounces) shredded mild Cheddar cheese
1/2-cup (2-ounces) shredded sharp Cheddar cheese
1/2-cup (2-ounces) shredded Monterey Jack
2-cups half-and-half
1-cup (8 ounces) Velveeta, cut into small cubes
2 large eggs, lightly beaten
1/4-tsp seasoned salt
1/8-tsp freshly ground black pepper


PREHEAT the oven to 350˚F.

LIGHTLY butter a deep 2-1/2 quart casserole.

BRING a large pot of salted water to a boil over high heat.

ADD the oil, then the elbow macaroni and cook until the macaroni is just tender, about 7 minutes. DO NOT overcook.

DRAIN well and return to cooking pot.

IN a small saucepan, melt eight tablespoons of the butter and stir into the macaroni.

IN a large bowl, combine the Muenster, mild and sharp Cheddar, and Monterey Jack cheeses. Blend well and set aside.

TO the macaroni, add the half-and-half, 1-1/2 cups of the shredded cheese, the cubed Velveeta, and the eggs.

SEASON the mixture with salt and pepper and blend ingredients until well combined.

TRANSFER macaroni to the buttered casserole and sprinkle with the remaining 1/2-cup of shredded cheese. Dot with the remaining one tablespoon of butter.

BAKE until it’s bubbling around the edges, about 35-minutes.

SERVE hot with a box of tissues on the side.


Always Enjoy!signature_small.jpg

Thursday, November 23, 2006

Fast Recipe For Banana-Walnut Pancakes

Oh my...these are pancakealicious! They are moist, light, fluffy and superbly delicious. The original recipe was taken from Tyler Florence who does everything five star, but it’s been tweaked just a bit to accommodate my family’s taste buds. These pancakes are an excellent choice for breakfast or brunch. You can even have them for lunch or supper. You might even prefer to eat them for dinner. You could possibly prepare them for a snack. You can eat one or two for an in-between snack. You can share them if you like. You can make them for a romantic breakfast with thick strips of smoked bacon on the side with the pancakes in the middle. Or you can have your honey-bunny lie on the side of the pancakes and eat the middle of the bacon. Whatever you decide to do with the middles and sides, just make sure that you only eat these every six months to keep your middle and sides from expanding!

Speaking of middles and sides, fill a large cold glass of milk to the middle and have it on the side.


Your Ingredients:

2-cups buttermilk
3 large eggs
1-tsp pure vanilla extract
2-cups all purpose flour
1-1/2-tsp baking powder
1-tsp baking soda
1 pinch salt
4-tbsp sugar
1/2-cup walnuts, toasted and finely ground (not chopped)
1/2-stick+2-tbsp unsalted melted butter, divided
3 bananas, peeled and sliced in 1/4-inch circles
Maple Butter, recipe follows
Walnuts, toasted and chopped into chunky pieces
1 additional banana, peeled and sliced thinly on the bias (diagonally)
Confectioner’s sugar

PREHEAT oven to 200-degrees F.

IN a large mixing bowl, whisk together the buttermilk, eggs, and vanilla until well combined.

IN another bowl, whisk together the flour, baking powder, baking soda, salt, and sugar.

COMBINE the wet ingredients with the dry and stir well with a rubber spatula or spoon to get rid of the lumps.

FOLD in the ground walnuts and 1/2-stick of melted butter and stir until batter is smooth.

HEAT a griddle or skillet over medium-low heat and add a little of the remaining melted butter to keep the pancakes from sticking.

USE a ladle to pour pancake batter onto the griddle or skillet.

COOK the pancakes on one side until they are set and the lightly press the bananas into the batter. When small bubbles appear on the uncooked surface, flip the pancakes and cook until golden on both sides, about 8 minutes.

TRANSFER the pancakes to a warming plate and place in the oven while you make the rest.

Your Ingredients For Maple Butter:

2 sticks unsalted butter, at room temperature
1/4-cup pure maple syrup
2-tbsp honey
1 sheet parchment paper

PLACE ingredients in a bowl and mash with a rubber spatula until well blended. Roll it up in the paper, like a tube and twist the ends so you have a log-shaped roll. Chill the maple butter roll in the refrigerator for 30-minutes.

REMOVE maple butter from fridge and slice into rounds.

PLACE the pancakes on a plate and put a slice of maple butter between each pancake and on the top. Place 2 diagonal slices of remaining banana on each stack and place the plates in the oven for about 1-1/2 minutes so that butter will melt and top banana slices will warm.

SPRINKLE with confectioner’s sugar and toasted chopped walnuts.

Note: To toast walnuts, place them evenly into a skillet on medium-low heat, stirring frequently to prevent burning. Remove from the heat when walnuts begin to release their flavor and are golden brown, about 3-4 minutes.


Always Enjoy!signature_small.jpg

Tuesday, November 21, 2006

Fast Facts About Eggs

Eggalicious!

Let’s talk about these wonderful little ovals that come in small, medium and large but never complain about their size or weight. They aren’t complaining little whiners who get all bent out of shape when you fold them in half. They don’t call the authorities when you beat them or flip them over on their little heads. You can even spin them around and they never get dizzy. They don’t sass you when you take them from the frying pan to the skillet. They don’t even lose their place when you try to scramble them up. They’re very affectionate and love it when you coddle them. They don’t shy away from poachers…they love to invite them. Although they love to cuddle up with each other, they don’t mind socializing with others. They have great little personalities and always wake up on the sunny side of their little beds. They never vie for their own space and are perfectly happy to remain wherever you put them. They never, ever worry about consequences when they’re in hot water. But…don’t let them fool you…they can be mighty devilish at times!

Tips & Techniques

Q: How can I tell the difference between a raw and cooked egg besides cracking it?
A: Spin each one on your counter (or any hard, flat surface). The one that spins is cooked.

Q: Do white eggs taste different then brown eggs?
A: No. The difference in color stems from the color of the hen’s ear lobes. Hens with cream-colored ear lobes lay white-shelled eggs, while hens with red ear lobes lay brown-shelled eggs. They are both equally nutritious.

Q: Does it matter how long you keep eggs?
A: It most certainly does. You should always try to find the freshest eggs. An egg is fresh when the shattered pieces are minimal when breaking. If the breaking of the egg causes a lot of little cracks, it means that there’s a thick membrane under the shell and the egg is old.

Q: Is it okay to eat eggs with double yolks?
A: Absolutely. Double yolks are due to hormonal changes during a hen’s reproductive life. They’re safe to eat and cook with.

Q: I hate when I drop an egg on the floor! It’s so hard to clean up and sometimes the dog’s not around.
A: Pour a little hill of salt over the egg and leave it for 10-15 minutes. It’ll pick right up.

Q: What is that yucky white stringy looking thing in the egg? Is that chicken sperm?
A: The scientific name for these strands is “Chalazae” and they anchor the yolk to the thick center of the white. They are not embryos and need not be removed although some people strain them out.

Q: Why do I see everyone putting salt in the pot before boiling eggs?
A: In addition to adding a bit of flavor, the salt prevents the egg from leaking out if it cracks while boiling.

Q: Can I keep my eggs on the counter like on TV?
A: Not a good idea. Eggs are perishable and should be stored in their carton in the refrigerator.

Q: What about those eggs with spots of blood? Isn’t that a little chicken in there?
A: No. Eggs with a visible spot of blood on the yolk are safe for consumption. Blood spots do not indicate fertilization and can be removed with the tip of a knife. The rupture of a blood vessel during the egg’s formation is responsible for the tiny blood spots.

Q: Can I freeze whole raw eggs?
A: Yes, but not in the shell. Crack the eggs into a bowl and slightly stir to break up the yolk a bit. Don’t incorporate too much air into the eggs. Transfer to a freezer container and label with the date and the number of eggs. They can be frozen for up to a year and should be thawed in the refrigerator prior to use.

Q: Can I freeze raw egg yolks?
A: Yes, but add 1/2-tsp of salt to 1-cup of yolks before freezing. If using them for desserts, add 1-tablespoon of sugar to 1-cup of yolks. This will prevent lumps. Label accordingly.

Q: Can I freeze raw egg whites?
A: Yes. Since raw egg whites do not suffer from freezing, no salt or sugar is needed. Break and separate the eggs one at a time, making sure that no yolk gets into the whites. Pour into ice trays and freeze until firm. Label the container with the date and number of egg whites. Thaw in the fridge before using.

Fresh Egg Conversions (based on a large 2-ounce egg)

Whole eggs: 3 whole eggs = 1/2-cup
1 whole egg = 3 tablespoons
1/2 whole egg = 4 teaspoons


Egg Yolks: 6-7 yolks = 1/2-cup
1 yolk = 1 tablespoon


Egg Whites: 4-6 whites = 1/2 cup
1 white = 2 tablespoons


Always Enjoy!signature_small.jpg

Fast Recipe For Filet Mignon

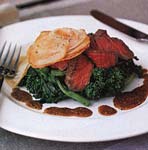
If you love the taste of horseradish and aren’t afraid that it will say, “neigh” (get it? horse…neigh!), you simply must try this recipe. And if you find that it’s just “too hot to trot” (ha ha ha…got you again!), just try a Quarter Horse, uh…I mean a quarter of the horseradish and you’ll be pleased with the fiery taste.

HORSERADISH ENCRUSTED FILET MIGNON (serves 4)

Your Ingredients:

1/2-cup prepared horseradish, drained
2-tsp dried basil
2-tsp dried thyme
2-tsp garlic powder
1/2-tsp salt
1/2-tsp freshly ground black pepper
4 filet mignons (6-7 ounces each)
nonstick cooking spray


PLACE first 6 ingredients in a bowl and blend well.

PRESS mixture firmly into both sides of each filet.

COVER and refrigerate overnight.

PREHEAT oven to 425-degrees F.

COAT a shallow roasting pan with cooking spray and add filets to pan.

ROAST filets for about 18-20 minutes, or until nicely browned on the outside and just pink in the middle.

REMOVE filets from oven, cover pan with foil, and allow filets to rest for 10 minutes.

PLACE filets on a cutting board and slice diagonally, across the grain, into thin slices.

ARRANGE filet slices on top of sautéed spinach and serve on individual serving plates.

Note: I hope this winning recipe will get a “whinny” out of you! (sorry, I just couldn’t resist!)


Always Enjoy!signature_small.jpg

Tuesday, November 14, 2006

Fast Recipe For Chocolate Torte

This decadent chocolate torte is for serious chocoholics. I was at a convention about 10 years ago, and several of us decided to have coffee and pastry for brunch in the hotel where we were staying. After being seated, our waiter rolled over a pastry cart laden with delectable goodies. My eyes immediately fell upon what appeared to be a slightly deflated slice of chocolate cake with fresh raspberries and whipped cream atop.

Well of course, that was on a Sunday, which is one of the days that I metamorphose into Your Smiling Snooper (remember people, weekends). I asked our dessert waiter what had happened to the poor, pathetic looking slice of cake. He wasn’t at all taken aback by what my tablemates surely considered a rude question. He smiled broadly and said, “This my dear, is a wonderfully delicious slice of a flourless chocolate torte.” Skeptic that I am, I demanded to know how you could make a torte without any flour. He said, “I will prove how delicious by allowing you and your friends to sample it.” Well how in the heck could we pass that offer up?

And then we were hooked.


FLOURLESS CHOCOLATE TORTE (serves 10-12)

Your Ingredients:

Butter for preparing cake pan
Unsweetened cocoa powder for dusting pan
15-ounces bittersweet chocolate (chopped)
2-1/4 sticks unsalted butter
7-egg yolks
10-tablespoons granulated sugar, divided
1-1/2-tablespoons dark rum
1-1/2-teaspoons pure vanilla extract
1-pinch salt
5-egg whites, room temperature
3-1/2 cups raspberries
confectioners’ sugar


PREHEAT oven to 300˚F.

BUTTER and dust with cocoa powder a 9-inch springform cake pan with 2-inch sides. You can also use a heart-shaped springform pan.

FILL the bottom of a double boiler with water (but DO NOT allow the water to reach the bottom of the top pan that you will place on top).

HEAT the water to simmering.

PLACE the bittersweet chocolate and 2-1/4 sticks of butter in the top pan of the double boiler.

WHISK the chocolate and butter until fully melted and well blended. Set aside to cool slightly.

PLACE the whisk attachment onto your electric mixer.

IN a large mixing bowl, beat together the egg yolks, 7-tablespoons granulated sugar, rum, vanilla and salt on medium-high speed until mixture is pale and very thick, about 3-5 minutes.

POUR in the chocolate and butter mixture and continue beating until well blended.

IN another large deep bowl, which is squeaky clean and dry, use another clean whisk attachment to beat the egg whites until foamy which should only take about 1 minute. DO NOT overbeat.

GRADUALLY add the remaining 3-tablespoons of granulated sugar and continue to beat until medium-firm peaks form, about 2 minutes.

SCOOP half of the egg whites into the chocolate mixture bowl and gently fold in. Add the remaining egg whites and continue folding until no streaks remain.

POUR the batter into the prepared pan and spread evenly.

BAKE
until the torte puffs slightly and when you insert a toothpick into the center, it comes out moist, but not runny, about 40 minutes.

DO NOT
overcook the torte because you think the toothpick should be dry.

REMOVE from oven and transfer the torte to a wire rack to cool for at least 30 minutes.

SET the springform pan on a large, wide can to remove the pan’s spring side. Let the spring side slide down.

COOL torte completely. When completely cool, cover with plastic wrap and refrigerate overnight.

SERVE
on individual dessert plates. Sprinkle lightly with confectioners’ sugar and top with a dollop of whipped cream and fresh (or thawed and drained) raspberries on the side or on top.

Note: You will achieve your best results when beating egg whites by using a spotlessly clean, dry bowl and beater. Any grease or fat, including egg yolk, will prevent the whites from expanding to their full volume. DO NOT overbeat or they will become clumpy and grainy, and the torte won’t rise as successfully. Gently fold the beaten egg whites into the batter to prevent them from deflating.


Always Enjoy!signature_small.jpg

Monday, November 13, 2006

How Do I Choose Foods That Go Together?

Let’s try this analogy. When you’re choosing something to wear, you try to choose clothing that will compliment the season, your coloring, the shape of your body and so forth.

The same factors apply to food selection and preparation. Just as you wouldn’t wear shorts and sandals in a wintry, snowy climate…you wouldn’t (or shouldn’t) want to serve your guests’ ice cream sundaes or Popsicles for dessert on a frosty evening. Beginning the meal with a rich, creamy hot soup and ending it with a warm bread pudding would probably be more appreciated.

Although colors aren’t directly related to taste, a visually appealing dish plays an important role when revving up the taste buds. Just as you probably wouldn’t choose to wear orange from head to toe, it’s probably just as important to create a meal that doesn’t consist only of mashed potatoes, rice and pasta.

Think about how much more visually appealing it will be to enhance your mashed potatoes with dots of yellow butter and flecks of fresh green parsley to accompany a piece of orange salmon and green Brussels sprouts on the side. Or fluffy yellow rice topped with pink shrimp and garnished with green cilantro and thin strips of red and green bell pepper. And finally, white linguini pasta topped with little brown meatballs with grated orange cheddar cheese and snipped green chives on top.

Additionally, the shape of food must be complimentary. If your meal consists of string beans, French fries and hot dogs…you have a pretty boring plate made up of long, narrow foods. More complimentary choices might include string beans, a rib eye steak and a dollop of mashed potatoes. This combination includes our shape and color enhancement along with the following factor of texture.

Now we look at the texture of your food choices as we apply it to your attire. It’s highly doubtful that you’ll make an impressive fashion statement by wearing polyester from head to toe. The same concept applies when attempting to make a dramatic statement with food.

Using a variety of textures in your selection of foods, will not only be visually appealing to your guests, but will also have a pleasing affect on their taste buds. When you serve a soup starter, you usually serve crusty bread or a crisp salad to accompany it. Or with pie or cobbler, you’d serve a smooth and creamy whipped cream topping or ice cream, which is usually an excellent compliment when the pie or cobbler has been warmed. So you not only have a variety of texture, but also a variety in temperature, which is very pleasing to the palate.

I hope that these suggestions will be helpful in your meal preparation. Time of year, color, shape and texture are all-important psychological factors to consider when choosing foods that go together. These enhancements will take your tasty meal to the heights of a fabulous meal.

Always Enjoy!signature_small.jpg

Friday, November 10, 2006

Fast Crock Pot Recipe For Cranberry-Apricot Pork Chops

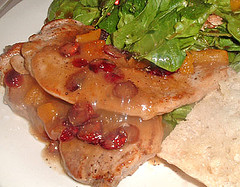
Cranberry-Apricot Pork ChopsIsn’t it amazing how the fall and winter seasons always seem to transform your home into a warm and cozy, wanna snuggle up with someone atmosphere? And if you don’t have a snuggler to snuggle with, all is not lost. Your Smiling Chef can solve most snuggler problems. If you click HERE, it will take you to a solution that will have you (the snugglee), ready to snuggle with your snuggle bunny (the snuggler) by the holidays.

There's lot’s of cooking and baking going on this time of year, with wonderful aromas of Thanksgiving and Christmas wafting through the air. Have you ever noticed how the wonderful scents of the holidays also extend into your shopping experience? The stores are perfumed with cranberry, cinnamon, ginger, cloves and apples that are excellent marketing maneuvers to put you in the mood to spend, spend, and spend some more.

Well, this is one of those warm and cozy recipes that will fill your home with the deliciously fragrant aroma of pork, cranberries and apricots.

It’s time to dust off that crock pot and make some wonderfully delicious things happen!


SPICY CRANBERRY LOIN CHOPS (serves 4)

Your Ingredients:

1-can whole-berry cranberry sauce
2 medium Vidalia onions, divided (wash; thinly slice the first onion and slice the second onion into about 1/4-inch rounds)
1/2-cup dried apricots, chopped
1-can (5.5 ounces) apricot nectar
1/2-cup granulated sugar
2-tsp cider vinegar
1-tsp dried mustard
1-tsp salt
1 small scotch bonnet pepper, minced (use disposable gloves when handling this pepper)
4 large boneless loin chops, washed and patted dry

MIX together all ingredients EXCEPT the thickly sliced onions and loin chops in a bowl.

ADD enough cranberry mixture to your crock pot to cover the bottom.

PLACE the thickly sliced onions on top of the cranberry mixture to use as a rack.

PLACE the loin chops on top of the onion slices and pour the remaining cranberry mixture over the loin chops.

COVER the crock pot and cook on low for 6-8 hours or until loin chops are tender.

NO peeking.

WHEN ready to serve, be sure to top each chop with the delicious cranberry-onion-apricot glaze.

SERVE with my recipe for Sinful Mashed Potatoes along with a green vegetable.

GARNISH with a sprig of fresh parsley.

EXERCISE for a week, non-stop.


Always Enjoy!signature_small.jpg

Thursday, November 09, 2006

Chinese Fast Food Recipe For Fabulous Fried Rice

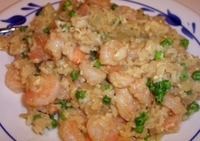
Here’s an excellent recipe for fried rice that is laden with shrimps, crabmeat and ham. I would venture to say that you just might think twice before heading to your neighborhood restaurant for takeout after you’ve tried this delicious recipe.

This would also be a hit at your next party. You could serve the fried rice to your guests in Chinese takeout pails and provide chopsticks on the side. Many stores even carry the fancy-schmancy ones.

Or you could just serve it on your regular dinnerware. Either way, the tastiness of this dish puts the “Y” in YUMMY!


CHINESE FRIED RICE

Your Ingredients:

1-pound uncooked medium shrimp, divided (washed, peeled and deveined)
1-1/2 tbsp oyster sauce, or to taste
1-1/2 tbsp soy sauce, or to taste
2-tsp cornstarch (mix with a couple of tablespoons of cold water until smooth)
1/2-pound good quality cooked ham, diced
1/2-pound fresh or frozen lump crabmeat, fully cooked (they also have 6-ounce packages in the tuna aisle)
1 medium onion, diced
4 scallions, sliced thinly on the bias
4 eggs
salt, to taste
freshly ground pepper, to taste
6-tbsp oil for frying (you may need more or less)
1-cup frozen peas, thawed and drained
5-cups cooked rice, cold


DRY shrimp with paper towels and place about 1/2-pound of the shrimp in a bowl and set aside.

CHOP the other 1/2-pound into small pieces and add to the bowl with the whole shrimp.

ADD the oyster sauce, soy sauce, salt, pepper and cornstarch mixture to the shrimp and toss well to coat.

PLACE shrimp mixture in fridge and allow it to marinate for about 15-30 minutes.

IN the meantime, place the diced ham, onion and scallions in separate bowls.

IN another bowl, beat the eggs lightly with a dash of salt and freshly ground pepper. Set aside.

HEAT the wok to medium heat and then add 1-2 tablespoons of oil.

WHEN the oil is ready, add the egg mixture into the wok and cook on medium heat (DO NOT scramble, they should resemble a flat pancake) until done and turn over to cook the second side.

REMOVE eggs from heat and slice the eggs into thin strips. Set aside.

REMOVE the shrimp mixture from the fridge.

ADD about 2 more tablespoons of oil to the hot wok. When the oil is ready, stir-fry the diced onion and shrimp on high heat for a couple of minutes (until the shrimp turn pink and onions are opaque).

REMOVE the shrimp/onion mixture and set aside.

ADD the diced ham, crabmeat and green peas to empty wok, stir-fry for a minute or so and remove from the wok. Set aside.

ADD 2 more tablespoons of oil to the empty wok and turn heat down to medium. When oil is hot, stir-fry the cooked rice. You can add a bit of the marinade now.

ADD all other ingredients into the wok with the rice EXCEPT for the eggs and scallions, which will be used for garnishing the top of your finished dish.

ADJUST seasonings and add more of the leftover marinade if necessary.

OR you can stir-fry ALL of the ingredients together without having a garnish. Or you could stir-fry all of the ingredients together and make EXTRA eggs and scallions for garnish. Heck, you’ll probably cut down on quite a few steps once you get the hang of it. It’s really up to you. You may just want to have a garnish if serving to guests. But you should also think about it this way…who are you if you aren’t your very best guest?


Always Enjoy!signature_small.jpg

Wednesday, November 08, 2006

Fast Appetizer Recipe For Crab Rangoon

Add an Asian flair to your holiday party! Or make them for your next romantic dinner. Whatever your next occasion may be, everyone will be sure to compliment you on these bite-sized, fried dumplings filled with fresh crab meat. These delicious little treats are crunchy on the outside, but oh so creamy on the inside.

Although these are simple and easy to make, they are delightfully flavorful. These little appetizers always seem to disappear quickly, so double or triple the recipe depending on the size of your guest list. You can also make these ahead of time and store them (uncooked) in your freezer.

CRAB RANGOON (makes 12)

Your Ingredients:

1-cup (about half a pound) fresh or frozen lump crab meat, thawed, drained and flaked
8-ounces cream cheese, room temperature
1/2-tsp soy sauce
1-clove garlic, finely minced
1/3-cup scallions, finely chopped
pinch of freshly grated ginger
1 pkg wonton wrappers (about 4-inch square)
1 small bowl of water for wetting wontons
Oil for deep-frying

IN a bowl, mix together the fresh crabmeat, softened cream cheese, soy sauce, garlic, scallions and pinch of ginger.

LAY wonton wrapper in front of you on a flat surface and position it like a diamond.

ADD a heaping 1/2-teaspoon of the crab filling to the center of the wrapper.

FOLD the wonton over the filling so that it looks like a triangle.

MOISTEN the edges with a little water and as you are pressing the edges together to seal, press the excess air out of the wonton to keep the wonton from puffing up as it cooks.

FOLD each end of the triangle in toward the center of the wrap (sort of like an envelope) and leave the tips vertical while moistening the part underneath the tip and seal to the front of the wonton.

PLACE each finished Crab Rangoon under a damp paper towel to keep them from drying out while you finish the remainder.

HEAT oil in a deep fryer to approximately 350˚-375˚F.

WHEN the oil is ready, carefully add a few wontons at a time to the hot oil and cook until golden brown, turning once.

REMOVE from oil and place on paper towels to drain.

REPEAT process until all wontons have been fried.

SERVE warm with duck sauce for dipping.


Always Enjoy!signature_small.jpg

Tuesday, November 07, 2006

Fast Cookie Recipe For Gift-Giving

These buttery cookies are melt-in-your-mouth delicious! Aunt Nancy and my mom used to make these all the time, but for holidays, they’d use appropriately colored sprinkles on the top. As far as I’m concerned, whoever invented sprinkles should have to eat every single one of them. Right now. Before they stock the shelves with them for the holidays. When I go to the market and see them displayed on the shelves in the baking aisle, it takes every ounce of strength that I can muster to keep me from opening each and every sprinkle container and dropping them down the holes in the freezer cases. I hate sprinkles. Oops…maybe I should say, “I dislike them immensely.” I mean, what’s the whole point of those irritating little seed-like things that fall all over your carpet, your table, your book, your desk, your countertop, your car seat, and your dog. They fall in your bed, in the sink, in the oven, in your opened mail, in the neighbor’s Margarita, and in your blouse.

Sheesh…I better get back to this divine butter cookie recipe before I work myself into such a tizzy that I head on over to my friendly neighborhood grocery store and…


DIVINE BUTTER COOKIES (makes about 5 dozen cookies)

Your Ingredients:

1-pound unsalted butter, room temperature
1-1/2 cups granulated sugar
1/2-tsp salt
3-tsp pure vanilla extract
2 large egg yolks
4 cups all-purpose flour

USING an electric mixer, combine the butter, sugar, salt and pure vanilla extract and beat until smooth and creamy.

ADD the egg yolks and beat until well incorporated. (don’t forget to scrape down the sides of your mixing bowl)

TURN the mixer speed down and add the flour a little at a time (so you don’t wind up wearing it) until just incorporated.

PLACE dough on a floured surface (flour your hands too because dough is sticky) and knead a few times to smooth out the dough.

WRAP the ball of dough in plastic wrap. If you’d like to slice the cookies instead of making shapes, roll the dough into a log.

REFRIGERATE wrapped dough for several hours (it makes it much easier to handle). You can even freeze the dough until ready to use.

PREHEAT oven to 325˚F on the day of baking.

REMOVE the dough from the fridge.

LINE 5 cookie sheets with parchment paper (12 cookies per sheet).

IF you’ve rolled a log, you can slice 1/4-inch rounds and place on cookie sheets about an inch apart. Although they really don’t spread, you still need air around each cookie.

BAKE until they just get a hint of gold around the edges, about 15-17 minutes. DO NOT look for your cookie to brown. Okay, maybe just a teensy bit.

IF you’ve decided to make shapes, the dough temperature needs to be a bit toward room temperature (but not all the way) so that it’s more pliable. If the dough becomes too soft, just stick it back in the fridge. You can use a cookie press or roll out the dough with a rolling pin (they sometimes have smaller cookie rolling pins at Target in the $1.00 aisle near the front of the store) and use your favorite cookie cutters. With either, you’ll need a floured surface and you’ll need to dip the cookie press or cookie cutters into the flour after each cut. Remember, the warmer the dough becomes, the stickier it is.

PLACE cutout cookies on baking sheets and follow instructions from above.

REMOVE from oven and let them cool for about 10 minutes on its cookie sheet because if you attempt to transfer them to a cookie rack while they’re warm, they’ll fall apart and you’ll be pretty pissed.

WHEN cookies have cooled a bit, use a metal spatula to transfer them to a cookie cooling rack. Aren’t you glad you waited?

Note: Although there are many things that you could do with this recipe, my absolute favorite is to make two batches of dough and add Heath Bar Chips to one of the batches. I add the chips when they first come out of the mixing bowl and I just knead them right in. OMG, these are so incredibly delicious! Then I sprinkle confectioners sugar on the second batch right after they’ve come out of the oven. It’s really easy if you use a shaker.

I also like to give these as gifts. And as much as it stresses me to admit it, I will put the damn sprinkles on the butter cookies right before they go into the oven. People always make “ooh and aah” noises over them. Especially when I put the red and green ones on the butter cookies for Christmas. But that’s only until some of those sprinkles fall down the front of their shirt and they pick, pick, pick with their hand down their shirt or blouse trying to remove the things. I should really tell them that they’ll never get them all. They can pick until sprinkles go out of style…and you know what that means, don’t you? It’ll NEVER happen in a MILLION years!


Always Enjoy!signature_small.jpg

Fast Vegetarian Recipe For Yummy Quesadillas

This tasty quesadilla offers a garden-harvest version of a Mexican favorite. If you prepare your ingredients in advance and use frozen or canned black beans, this recipe is a snap to put together. You can make the entire recipe and freeze the extra or you can halve the recipe and eat for dinner tonight.

But if you have more time and prefer to cook your black beans from scratch, make sure to pick through the dried beans very well and discard any beans that have pinholes in them since that’s a sign of bug infestation. And you guys KNOW how I feel about BUGS! Just typing this paragraph is traumatic for me. I may have to go and see... Hold it! I refuse to let this bother me today. Let me finish my recipe introduction...
Also, discard any small rocks or twigs (although crunchy, one or the other is bound to break a tooth and then you can't have a smile like Your Smiling Chef) and wash your beans thoroughly several times (until your water runs clear).


VEGGIE QUESADILLAS (serves 6)


Your Ingredients:

2-cups cooked black beans
2-cups chicken stock, divided
salt and pepper, to taste
2-cups tomatoes, washed and diced
1-cup ripe avocado, diced
4-5 tbsp fresh cilantro, washed and minced
1/4-cup red onion, washed and diced
4 cloves fresh garlic, minced
2 jalapeno peppers (washed, seeded and minced)
4 tbsp freshly squeezed lime juice
1-tsp ground cumin
2-tbsp olive oil
2-cups zucchini, washed and julienned (cut into thin matchsticks)
2-cups fresh whole kernel corn (I prefer to slice kernels off the cob but frozen will be just fine)
salt and pepper, to taste
vegetable cooking spray
6 (8-inch) flour tortillas (3 bottoms and 3 tops)
6-ounces Cheddar cheese, shredded (more if you like)
6-ounces Monterey Jack cheese, shredded (more if you like)
fresh cilantro sprigs, washed


PREHEAT oven to 400˚F.

IF using frozen black beans, place your beans in a small pot with 1-cup of the chicken stock, salt and pepper.

BRING to a boil. Reduce heat, cover and simmer 45-60 minutes or until tender. Drain off liquid and set aside.

IN a large bowl, combine remaining chicken stock with tomato, avocado, cilantro, onion, garlic, peppers, lime juice, and cumin. Blend well and set aside.

COAT a large skillet with olive oil and place over medium-high heat until hot.

ADD zucchini and sauté about 4-5 minutes until tender.

ADD corn to zucchini and sauté about 3 more minutes.

REMOVE from heat and stir in drained black beans. Blend well and set aside.

PLACE 2 tortillas on one baking sheet and 1 tortilla on another sheet coated lightly with cooking spray. (unless you have a baking sheet large enough to accommodate all three)

TOP
each tortilla with shredded Cheddar, then zucchini mixture and finally shredded Monterey Jack. Top with remaining 3 tortillas.

BAKE at 400˚F for 8-10 minutes or until quesadillas are crisp and the cheese has melted.

REMOVE from oven and allow quesadillas to rest a couple of minutes (so cheese sets for a bit and doesn’t just run out).

CUT each quesadilla into fourths (like pizza slices) and place 2 on each serving plate.

TOP each quesadilla with tomato mixture and garnish with fresh cilantro sprigs.


Always Enjoy!signature_small.jpg

Fast Cooking Recipe For Mustard Breadsticks

You and your family will become absolutely addicted to these delicious breadsticks. They’re simple to prepare and you can have them on the table in less than an hour. Although I always use Gruyere cheese because I love its wonderfully delicate and smoky flavor, you can substitute with freshly grated Parmesan if that’s more to your taste.

MUSTARD CHEESE BREADSTICKS


Your Ingredients:

1 (11-ounce) container of Pillsbury breadstick dough
2-tbsp butter
1/2-cup coarse-grained mustard
1/4-cup Gruyere cheese, grated
1-tbsp fresh dill (I always tear off a bit from the bunch and put it in a bag to be weighed at the checkout)
sea salt, finely ground

PREHEAT oven to 350˚F.

IN a small pot, heat the coarse-grained mustard and butter together until well blended. Set aside.

USING a small food processor, pulse the Gruyere cheese and the dill together until it resembles cornmeal. Place in a bowl and set aside.

LINE two baking sheets with Silpats (or parchment paper).

SEPARATE the dough strips where perforated and slice each strip lengthwise to form thinner strips.

DIP each strip, one at a time, into the mustard and butter mixture, then immediately roll in the Gruyere and dill mixture to coat entire strip.

TWIST each strip gently and place on prepared baking sheets.

SPRINKLE the breadsticks with the sea salt if you wish, although it’s not necessary.

PLACE in the preheated oven and bake for 10-13 minutes or until golden brown. Keep an eye on breadsticks so they don’t burn, as I’ve been guilty of this on more than one occasion. Okay, maybe more than 5 occasions and I’ll leave it at that.

SERVE in a napkin-lined oval serving bowl or dish.


Always Enjoy!signature_small.jpg

Friday, November 03, 2006

Useful Cooking Terms

Although this list of cooking terms can't possibly cover the vast array of terms used throughout the entire world, I hope that you will find them very useful and helpful in your everyday meal preparation. Now if there's a really, really cool or necessary term that I need to add, just leave me a comment at the bottom of this list and I'll be happy to include it here.
Aerate: Sift or pass through a fine-mesh device to break up large pieces and to incorporate air into the ingredients to make them lighter.

Al dente: Cooked until tender, but slightly firm to the bite.

Au jus: Served in natural unthickened meat juices from roasting.

Bake: To cook, covered or uncovered, usually by dry heat.

Bake Blind: To bake a pastry shell empty, without a filling.

Baste: To brush or spoon liquid fat or juices over meat during roasting to add flavor and to prevent it from drying out.

Batter: A liquid mixture containing flour and other ingredients that can be poured or dropped from a spoon. Also a coating for fried foods.

Beat: To smoothen a mixture by briskly whipping or stirring it with a spoon, fork, wire whisk, rotary beater, or electric mixer.

Bias-slice: To slice food crosswise at a 45-degree angle.

Bind: To thicken a sauce or hot liquid by stirring in ingredients such as eggs, flour, butter, or cream.

Blackened: A popular Cajun-style cooking method in which seasoned foods are cooked over high heat in a super-heated skillet until charred.

Blanch: To boil briefly to loosen the skin of a fruit or vegetable. After 30 seconds in boiling water, the fruit or vegetable should be plunged into ice water to stop the cooking action, and then the skin easily peels off and sets the color and flavor.

Blend: To mix or fold two or more ingredients together to obtain equal distribution throughout the mixture.

Boil: To cook food rapidly in a boiling liquid that is bubbling vigorously.

Bone: To remove bones from meat, poultry, or fish.

Bouquet Garni: Bundle of several herbs tied into cheesecloth used to flavor soups and stews.

Braise: A cooking technique that requires browning meat in oil or other fat and then cooking slowly in liquid to tenderize the meat.

Bread: To coat the food with bread or cracker crumbs (sometimes seasoned) before cooking.

Broil: To cook food directly under the heat source.

Broth or stock: A flavorful liquid made by gently cooking meat, seafood or vegetables (and/or their by-products, such as bones and trimming) often with herbs, in liquid, usually water.

Brown: A quick sautéing, pan/oven broiling, or grilling method done either at the beginning or end of meal preparation, often to enhance flavor, texture, or eye appeal.

Brush: Using a pastry brush, to coat a food such as meat or bread with melted butter, glaze, or other liquid.

Bundt pan: The generic name for any tube-baking pan having fluted sides (though it was once a trademarked name).

Butterfly: To cut open a food such as pork chops down the center without cutting all the way through, and then spread apart.

Carmelization: Browning sugar over a flame or cooking onions until sweet and golden, with or without the addition of some water to aid the process.

Chiffon: Pie filling made light and fluffy with stabilized gelatin and beaten egg whites.

Chill: To refrigerate food or let stand in ice or ice water until cold.

Chop: To cut food into irregular pieces.

Clarify: Remove impurities from butter or stock by heating the liquid, then straining or skimming it.

Coat: To evenly cover food with flour, crumbs, or a batter.

Coat a spoon: Stage reached by a thickened liquid mixture when it leaves a thin film on the back of a metal spoon.

Coddle: A cooking method in which foods (such as eggs) are put in separate containers and placed in a pan of simmering water for slow, gentle cooking.

Combine: To blend two or more ingredients into a single mixture.

Confit: To slowly cook pieces of meat in their own gently rendered fat.

Condiment: A sauce, relish, or spice used to season food at the table.

Core: To remove the inedible center of fruits such as pineapples.

Cream: To beat vegetable shortening, butter, or margarine, with or without sugar, until light and fluffy. This process traps in air bubbles, later used to create height in cookies and cakes.

Crepes: Wafer-thin pancakes.

Crimp: To create a decorative edge on a piecrust. On a double piecrust, this also seals the edges together.

Crisp: To restore the crunch to foods, vegetables such as celery and carrots can be crisped with an ice water bath, and foods such as stale crackers can be heated in a medium oven.

Crush: To condense a food to its smallest particles, usually using a mortar and pestle or a rolling pin.

Crystallize: To form sugar or honey-based syrups into crystals. The term also describes the coating.

Cube: To cut into small cubes (about 1/2-inch). In meats, to tenderize by pounding with a special tool that imprints a small checkered pattern on the surface, breaking tough fibers to tenderize the meat.

Curd: Custard-like pie or tart filling flavored with juice and zest of citrus fruit, usually lemon, although lime or orange may also be used.

Curdle: To cause semisolid pieces of coagulated protein to develop in food, usually as the result of the addition of an acid substance, or the overheating of milk or egg-based sauces.

Cure: To preserve or add flavor with an ingredient, usually salt and/or sugar.

Custard: A mixture of beaten egg, milk, and possibly other ingredients such as sweet or savory flavorings, which is cooked with gentle heat, often in a water bath or double boiler. As pie filling, the custard is frequently cooked and chilled before being layered into a prebaked crust.

Cut in: To distribute solid fat into dry ingredients with a pastry blender (or two knives scissor-fashion) until particles are desired size.

Dash: A very small amount approximately equal to 1/16th teaspoon.

Deep-fry: To completely submerge the food in hot oil.

Deglaze: To add liquid to a pan in which foods have been fried or roasted, in order to dissolve the caramelized juices stuck to the bottom of the pan.

Degrease: To skim fat from the surface of a liquid.

Devil: To add hot or spicy ingredients such as cayenne pepper or Tabasco sauce to a food.

Dice: To cut into very small pieces (about 1/8 to 1/4 inch).

Direct heat: A cooking method that allows heat to meet food directly such as grilling, broiling or toasting.

Dot: To scatter bits of an ingredient, such as butter, over surface of food.

Dough: A combination of ingredients including flour, water or milk, and sometimes, a leavener, producing a firm but workable mixture for baked goods.

Dredge: To sprinkle lightly and evenly with sugar or flour. A dredger has holes pierced on the lid to sprinkle evenly.

Drippings: Used for gravies and sauces, drippings are the fluids left in the bottom of a roasting or frying pan after meat is cooked.

Drizzle: To pour a liquid such as a sweet glaze or melted butter in a slow, light trickle over food.

Dust: To sprinkle food lightly with spices, sugar, or flour for a light coating.

Egg wash: A mixture of beaten eggs (yolks, whites, or whole eggs) with either milk or water. Used to coat cookies and other baked goods to give them a shine when baked.

Emulsion: A mixture of liquids, one being a fat or oil and the other being water based so that tiny globules of one are suspended in the other. This may involve the use of stabilizers such as egg or mustard. Emulsions may be temporary or permanent.

Entrée: A French term that originally referred to the first course of the meal, served after the soup and before the meat courses. In the United States, it refers to the main dish of the meal.

Fat: Generic term for butter, margarine, lard, vegetable shortening; also the rendered drippings of meat and fowl.

Fillet: To remove the bones of meat or fish for cooking.

Filter: To remove lumps, excess liquid, or impurities by passing through paper or cheesecloth.

Fines Herbes: Equal amounts of fresh or dried parsley, tarragon, chervil, and chives.

Firm-ball stage: In candy making, the point where boiling syrup dropped in cold water forms a ball that is compact yet gives slightly to the touch.

Flake: To lightly break into small, thin pieces, with tines of a fork.

Flambé: To ignite a sauce or other liquid so that it flames.

Flan: An open pie filled with sweet or savory ingredients; also, a Spanish dessert or baked custard covered with caramel.

Floret: A small flower, one of a cluster of composite flowers as in broccoli or cauliflower.

Flute: To create a decorative scalloped or undulating edge on a piecrust or other pastry.

Fold: To gently combine a light, delicate, aerated substance, such as whipped cream or beaten egg whites into a heavier mixture.

Freeze: To chill rapidly at 0-degrees until solid.

Fricassee: Usually a stew in which the meat is cut up, lightly cooked in butter, and then simmered in liquid until done.

Fritter: Sweet or savory foods coated or mixed into batter, then deep-fried (also, in French, beignet).

Frizzle: To cook thin slices of meat in hot oil until crisp and slightly curly.

Fry: To cook food in hot cooking oil, usually until a crisp brown crust forms.

Ganache: A rich chocolate filling or coating made with chocolate, vegetable shortening, and possibly heavy cream. It can coat cakes or cookies, and be used as a filling for truffles.

Garnish: A decorative piece of an edible ingredient such as parsley, lemon wedges, croutons, or chocolate curls placed as a finishing touch to dishes or drinks.

Gel: To congeal, becoming firm enough to retain the shape of its container.

Glaze: A liquid that gives an item a shiny surface.

Gluten: A protein formed when hard wheat flour is moistened and agitated. Gluten is what gives yeast dough its characteristic elasticity.

Grate: To shred or cut down a food into fine pieces by rubbing it against a rough surface.

Gratin: To bind together or combine food with a liquid such as cream, milk, béchamel sauce, or tomato sauce, in a shallow dish. The mixture is then baked until cooked and set.

Grease: To rub fat or oil on surface of utensil to prevent food from sticking.

Grill: To cook on a rack over direct heat.

Hard-ball stage: In candy making, the point at which syrup has cooked long enough to form a solid ball in cold water.

Hull (also husk): To remove the leafy parts of soft fruits, such as strawberries or blackberries.

Ice: To cool down cooked food by placing in ice; also, to spread frosting on a cake.

Infusion: Extracting flavors by soaking them in liquid heated in a covered pan. The term also refers to the liquid resulting from this process.

Jell (also gel): To cause a food to set or solidify, usually by adding gelatin.

Jerk or Jamaican jerk seasoning: A dry mixture of various spices such as chilies, thyme, garlic, onions, and cinnamon or cloves used to season meats such as chicken or pork.

Julienne: To cut into long, thin strips.

Jus: The natural juices released by roasting meats.

Knead: To work dough with the heels of your hands in a pressing and folding motion until it becomes smooth and elastic.

Larding: Inserting strips of fat into pieces of meat, so that the braised meat stays moist and juicy.

Leavener: An ingredient or process that produces air bubbles and causes the rising of baked goods such as cookies and cakes.

Line: To cover the inside or bottom of a baking dish or pan with parchment paper, waxed paper, or crumbs before adding food.

Loin: A cut of meat that typically comes from the back of the animal.

Marble: To gently swirl one food into the other.

Marinade: A seasoned liquid, usually containing acid, such as vinegar or wine, in which food soaks, tenderizing it and enhancing the flavor.

Marinate: To combine food with aromatic ingredients to add flavor.

Marzipan: A paste (of ground almonds, sugar, and egg whites) used to fill and decorate pastries.

Mash: To beat or press a food to remove lumps and make a smooth texture.

Mask: To cover completely with a sauce, aspic, jelly, mayonnaise, or cream.

Medallion: A small round or oval bit of meat.

Meringue: Eg whites beaten until they are stiff, then sweetened. It can be used as the topping for pies, or baked as cookies.

Mince: To chop food into tiny, irregular pieces.

Mix: To beat or stir two or more foods together until they are thoroughly combined.

Moisten: Adding enough liquid to dry ingredients to dampen but not soak them.

Mull: To slowly heat wine or cider with spices and sugar.

Pan-broil: To cook food in a skillet without added fat, removing any fat as it accumulates.

Pan-fry: To cook in a hot pan with small amount of hot oil, butter, or other fat, turning the food over once or twice.

Parboil: To partly cook in a boiling liquid.

Parchment: A heavy, heat-resistant paper used in cooking.

Pare: To peel or trim a food, usually vegetables.

Peaks: The mounds made in a mixture. For example, egg white that has been whipped to stiffness. Peaks are “stiff” if they stay upright, or “soft” if they curl over.

Peel: To strip, cut off, or pull away skin or rind.

Pesto: A sauce usually made of fresh basil, garlic, olive oil, pine nuts, and cheese. The ingredients are finely chopped and then mixed, uncooked, with pasta.

Pinch: Same as dash.

Pipe: To force a semisoft food through a bag (either a pastry bag or a plastic bag with one corner cut off) to decorate food.

Pit: Using a sharp knife to take out the center stone or seed of a fruit, such as a peach or a mango.

Poach: To simmer in liquid.

Precook: To cook food partially or completely before final cooking or reheating.

Preheat: To heat oven or griddle to desired temperature before beginning to cook.

Pressure-cooking: A cooking method that uses steam trapped under a locked lid to produce high temperatures and achieve fast cooking time.

Proof: To let yeast dough rise.

Punch down: To deflate a risen yeast dough by pushing it down with fist to expel air.

Puree’: To sieve or whirl food into a smooth thick mixture.

Ramekin: A small baking dish used for individual services of sweet and savory dishes.

Reconstitute: To take a dried food such as milk back to its original state by adding liquid.

Reduce: To cook liquids down so that some of the water evaporates.

Refresh: To pour cold water over freshly cooked vegetables to prevent further cooking and to retain color.

Render: To melt down fat to make drippings.

Roast: To cook uncovered in the oven.

Roux: A cooked paste usually made from flour and butter used to thicken sauces.

Salad oil: Vegetable oil.

Sauté: To cook food quickly in a small amount of oil in a skillet or sauté pan over direct heat.

Scald: Cooking a liquid such as milk to just below the point of boiling, also used to loosen the skin of fruits or vegetables by dipping them in boiling water.

Score: To tenderize meat by making a number of shallow diagonal cuts across its surface. This technique is also useful in marinating, as it allows for better absorption of the marinade.

Sear: To brown meat briefly over high heat to seal in juices.

Season: To enhance the flavor of foods by adding ingredients such as salt, pepper, oregano, basil, cinnamon, and a variety of other herbs, spices, condiments, and vinegars. Also, to treat a pot or pan (usually cast iron) with a coating of cooking oil and baking in a 350˚F oven for approximately 1 hour (this process seals any tiny rough spots on the pan’s surface that may cause food to stick).

Seize: To form a thick, lumpy mass when melted (usually applies to chocolate).

Set: Let food become solid.

Shortening, solid: A white solid fat made from refined vegetable oil that has been partially hydrogenated, chilled, and whipped.

Shred: To cut or tear into long narrow strips, either by hand or by using a grater or food processor.

Sift: To remove large lumps from a dry ingredient such as flour or confectioners’ sugar by passing through a fine mesh. This process also incorporated air into the ingredients, making them lighter.

Simmer: Cooking food in a liquid at a low enough temperature that small bubbles begin to break the surface.

Skim: To remove the top fat layer from stocks, soups, sauces, or other liquids such as cream from milk.

Springform pan: A two-part baking pan in which a spring-loaded collar fits around a base, the collar is removed after baking is complete. Used for foods that may be difficult to remove from regular pans, such as cheesecake.

Steam: To cook in water vapors, on a rack or in a steam basket, in a covered pan above boiling water. This method keeps foods’ shape, texture, and nutritional value intact better than methods such as boiling.

Steep: To soak dry ingredients (tea leaves, ground coffee, herbs, spices, etc.) in liquid until the flavor is infused into the liquid.

Stewing: Browning small pieces of meat, poultry, or fish, then simmering them with vegetables or other ingredients in enough liquid to cover them, usually in a closed pot on the stove, in the oven, or with a slow cooker.

Stir: Using a spoon or whisk in a broad circular motion, to mix ingredients without beating, or to prevent them from sticking.

Stir-fry: The fast frying of small pieces of meat and vegetables over a very high heat with continual and rapid stirring.

Tart: A shallow open-faced pie with a filling.

Tent: To cover meat or poultry loosely with a piece of foil.

Texture: The structural quality of a food…roughness, smoothness, graininess, or creaminess.

Thin: To reduce a mixture’s thickness with the addition of more liquid.

Toss: To mix lightly but rapidly by lifting and turning ingredients with two forks or spoons.

Truss: To secure poultry or meat with skewers or string so that it will retain its shape during cooking.

Unleavened: Baked goods that contain no agents to give them volume, such as baking powder, baking soda, or yeast.

Vinaigrette: A general term referring to any sauce made with vinegar, oil, and seasonings.

Water bath: A gentle cooking technique in which a container is set in a pan of simmering water.

Whip: To incorporate air into ingredients such as cream or egg whites by beating until light and fluffy, also refers to the utensil used for this action.

Whisk: To mix or fluff by beating with a wire whisk until blended and smooth.

Yeast: A leavening agent activated by warm water.

Zest: The thin, brightly colored outer part of the rind of citrus fruits. It contains volatile oils, used as a flavoring.


Always Enjoy!signature_small.jpg